Saturday, June 6, 2015

New wheels

I have know received the new /115 thread wheels from North West Short Line, along with matching bushings. Dave at NWSL was very helpful. I just told him what I wanted to achieve, and he suggested suitable parts. Thanks Dave.


To be up and running again (pardon the pun) was a simple matter of removing the old wheels and bushings from the axles, and sliding (or pushing rather) the new ones on. Some careful track gauge matching got them rolling nicely through the turnout.

New wheels to the left, old to the right.


Test roll.


The new wheels are pre-weathered which was an improvement in itself.


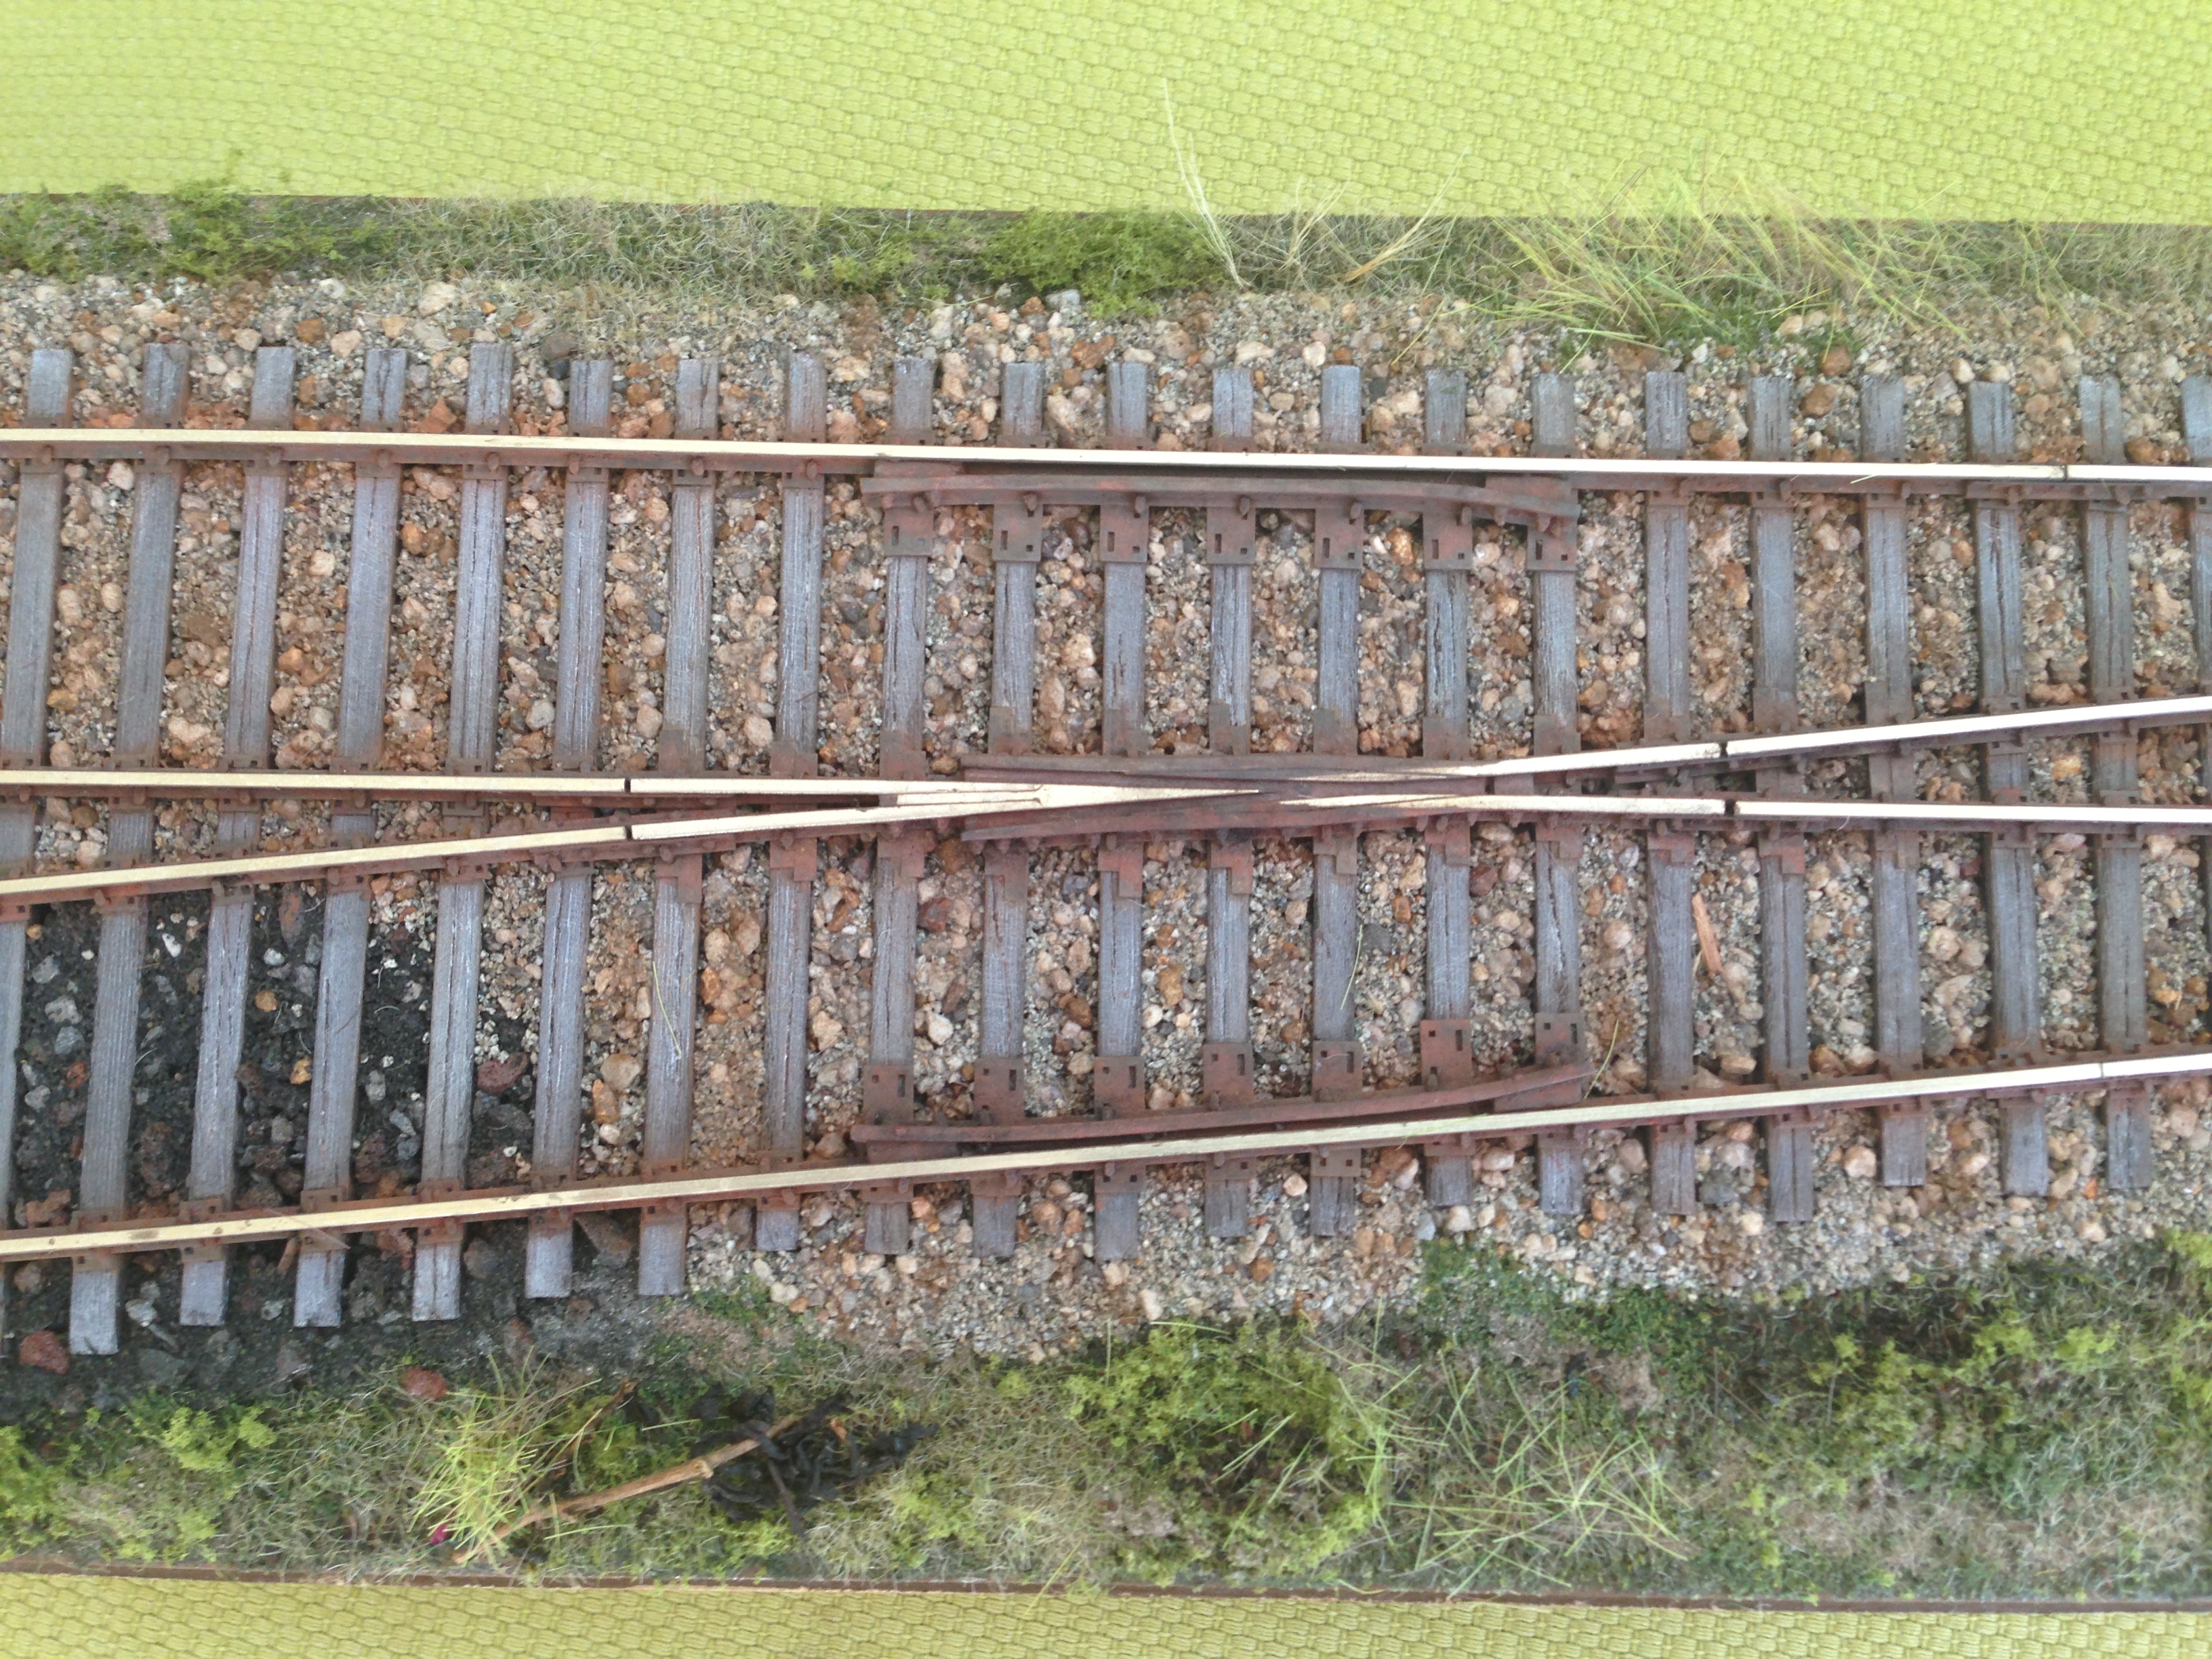
A nice fit between the guard and stock rails.


Posing on the new shelf. The turnout assembly will not sit on top of the foam, but will be lowered into it, while new track will be laid on the foam.

Saturday, May 23, 2015

Building a shelf

Now that I have an O scale turnout and a car to go with it, I might as well realize that I want to go further down the O Scale path. So I went ahead and threw out my never finished H0 Three Yards Yard layout. I have not done anything on that layout for a year and a half! That if anything should have been an indication of that I had lost interest and needed to start on something new.

Well, with that one gone I had an empty wall with already mounted wall bands for an Elfa shelf system. Those are wall bands left there from my former Tehachapi Summit layout (Comment 17 September 2022: the blog describing this layout no longer exists). Since I had brackets laying around as well, getting a new shelf up would not be problem.

But I started by attaching my old backdrop, used both on the Summit and Three Yards Yard layouts, as seen in the picture below. It needs a fresh coat of paint, but apart from that it was all ready to go.


Next I built the shelf itself. I wanted it to be light-weight and slender looking. What I did was to attach a frame of 8 mm x 67 mm (1/4" x 2 3/4") lumber around a layer of 50 mm (2") extruded foam. And that was it. A sturdy but where light shelf, placed on the brackets. Like this:


It is no problem to just lift it off the brackets and down to the cupboards below when I shall work on it, if I find its normal height to awkward.


Friday, May 15, 2015

The O scale turnout gets company

I could not resist the urge to see some rolling stock accompany the newly built O scale turnout. So I ordered an Atlas Master series PS-4427 low side hopper which arrived today. O scale really is  impressive!

Click to get a closer view


As expected, the gauge is "correct", in the sense that the car and the track "agree" on it, but the car cannot negotiate the guard rails. Also as expected, since the guard rails are more on Proto:48 distance from the stock rail. I want to keep it that way since it looks a lot better. As a consequence, if I am serious about getting the car to roll through the turnout, the next step is to order some replacement wheel sets.

But the bearing caps are actually rotating! Cool!

Sunday, April 19, 2015

An O Scale Turnout

My modeling efforts have been scarce these days, and not consistent when it comes to scale. My last contribution to the hobby is a turnout in O scale!

Click to get a closer view.

How come? Well, it started when I happened to run into Mike Cougill's book Detailing Track. Since I have always been more or less a nerd when it comes to realistically modeled track, this book really got me hooked. I just had to try this for myself! So I decided to build an O scale turnout, using the techniques outlined in Mike's book, and with the hardware details he recommended.

This is my parts list:


To use pine for the ties was not a very good idea. The pine is to hard to allow the spikes to be just pushed down. Instead I had to pre-drill every spike hole. Not very funny! Basswood is not readily available here in Sweden., but in retrospect I now know it would have been worth the effort to order it from overseas.
 
Some more photos:


Thanks for looking.

Thursday, April 17, 2014

A Tree

I seem to have become an armchair modeler, doing nothing but reading magazines and blogs, and visiting on-line forums.

But all of a sudden I got an urge to actually model something - a tree. I have recently seen a number of examples on people doing trees using twisted metal wires to form the tree armature, and I wanted to give that a try. You probably know what I mean.

Anyway, here is my attempt at a more or less bare tree, in late fall or early winter. What kind of tree? I don't know. A generic deciduous tree, I guess.

This is the tree when all the wires have been twisted.


Next step was to cover the stem and parts of some of the branches with spackel (lacking any other more suitable material such as modeling paste). It has also been painted with a gray primer out of a rattle-can. And it got a light dusting of black.


Last i added some dry leaves by first spraying the branches with hair spray and then sprinkle on some crushed real oak leaves. I am happy with the result.


Thanks for stopping by.

Tuesday, August 13, 2013

Building a warehouse, part 4

In this part of my little "Building a warehouse" series of posts we have arrived at the installation of the canopy. Before installing it above the loading dock, I spray painted it a light gray. Also before the canopy, I installed a number of down-spouts. I made those from styrene rod and small pieces of styrene strip bent around the rod. The latter simulating the hardware that keeps the down-spouts in place.

Here are some pictures of the warehouse with the canopy in place.


And here it is on the layout. Still lacking the roof, but that you cannot see from this angle.


Thanks for watching.
Thursday, August 8, 2013

Building a warehouse, part 3

I have put together the canopy, i.e. the roof above the loading dock. Right now, before painting it looks like this:


Agree. It does not look very interesting. Just some Evergreen corrugated metal siding. A closer look shows that I have attached some .080" (2.0mm) channel along one of the long sides:


The channel represents the gutter, and it will be on the side facing the wall, meaning the whole canopy will be slightly tilted towards the wall. That's the way it was done on the prototype I'm using. Better to have the rain water accumulate along the wall instead of between the loading deck and the cars being worked, I guess.

If the top side of the roof is fairly dull, the underside is more interesting.


Here you can see the supporting structure, built up of I-beams. A closer look shows the details:


The beam along the wall (far side in the picture) is .125" (3.2mm) I-beam. The cross members are the same size. The beams along the front and the middle are 0.080" (2.0mm).

The next step is painting and mounting the canopy to the warehouse wall.

Thanks for watching.