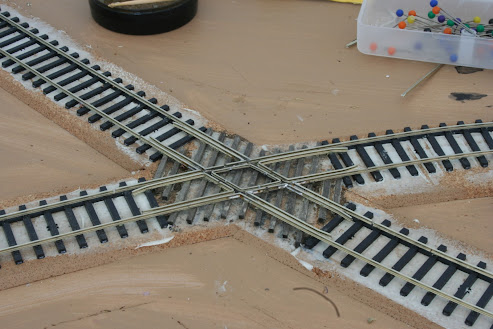
Next up was the U-shaped rails forming the guard rails, and actual rails in the middle of the crossing, for the other set of approach tracks. For those I took the easy route and bent the complete structure from a single piece of rail, as shown in the next picture. In that picture you can also see how I did the guard rails in the middle of the diamond.
I decided to use a piece of styrene sheet as a supporting base for the rails forming the actual diamond. This due to the (very) limited number of ties supporting each individual piece of this structure. Remember, the diamond shaped piece needs to be cut into four individual pieces in order to avoid shorts across the diamond when a loco is passing. I found out that if I used 0.3 mm styrene and code 40 rail I would obtain the same height as for code 55 rail (which is the rail height used for the rest of the crossing.
I cut and bent four L-shaped pieces of rail to form the diamond, with styrene sheet between them to form electrical gaps. This picture shows the progress when three of the four pieces are in place.
And here is a picture of the central piece, with all rail in place and the gap insulators cut back.
And here is the completed crossing, with all the required electrical gaps done with a Dremel tool. Not the most perfect crossing (I am far to impatient to ever construct the "perfect" piece of track work), but it certainly looks good enough in real life. The camera is unforgiving as usual.
Next I hooked up the electrical feeders, except for the ones to the Auto Reverser. I intended to test the crossing without the reverser first, to make sure there were no basic problems like shorts. So once the wires were in place I run my MP15 towards the crossing, expecting it to stop somewhere in the middle of the crossing (where there was no power). But to my surprise it just moved right through, without the slightest sign of hesitation. And the same thing for the other, crossing, track.
It turned out the distance between the first and last wheels is greater than the length of the unpowered part of the crossing, and the crossing does not need to be powered!
So all my worries, and the investment in a an Auto Reverser, were unnecessary. I'll save the reverser for some other project.
To summarize - a happy ending on a fun project. Below a picture of some test switching across the diamond.


No comments:
Post a Comment