Thursday, October 5, 2017

Making bushes

Nothing has happened on the layout for a long time, but a few days ago I felt like making a few bushes. Here is how.

I bent the ends of short pieces of wire into a loop (or something almost a loop). I then dabbed the ends in white glue and sprinkled some static grass fibers over them, while gently rotating the wire between my fingers. The wires were then set aside for the glue to set

When the glue had set I sprayed the fibres with hair spray (but any spray adhesive would of course do) and sprinkled on Noch 2.5 mm Scatter Grass. For some bushes I used "Forest Floor" and for others i used "Meadow". Some got a combination of both.

The pictures below shows the procedure .


I then planted the bushes at various locations around the layout.


Sunday, May 7, 2017

Engine couplers

I built a front coupler box for my SD-40, from pieces of styrene. A little askew, but you get the idea 😁


Saturday, April 22, 2017

Coupler boxes, part 4

I have finished the coupler install for the hoppers, also adding a few details such as cut levers and air hoses, and wrapping it up with some weathering.


I have also begun thinking about how to install Clouser couplers on the engine. SO far I have made some tests to figure out how to get the proper height.


Sunday, April 9, 2017

Coupler boxes, part 3

The coupler boxes have now been painted and installed on the cars. My local hobby shop did not carry any colors that were matches to the car ATSF and BN colors. I took some colors I think will do once the boxes have been weathered. Coupler box colors are not always the same as the car, and if they are tend to be rather rusty and dirty anyway.


Instead of starting on the weathering I could not resist first trying to create a cut lever and test it out. I bent some music wire according to the instructions that came with the Protocraft couplers. Here is a short video.


Friday, April 7, 2017

Coupler boxes, part 2

After having test fitted one of the coupler boxes on a car it was time to figure out how the couplers should be installed in the boxes.

For starters, I inserted a shim at the top inside of the box. This would not only lower the coupler to the correct height but would also make the coupler shank clear the upper "lip" at the box opening, As a bonus the shim, which was made out of .75 mm styrene, also added to the thickness of the top part of the box. Which would be good for the screw threads to come. Here are two of the boxes and the styrene shims to be glued in place inside the boxes. The shims could be no longer than that, or they would foul one of the box mounting screws. In the picture below the boxes are upside down, so the shim would go at the "bottom" in the picture.


Next I drilled and tapped a hole in the box for the coupler mounting screw (the smaller hole in the picture below). I also drilled a matching hole in the coupler shank, and shortened the shank. The latter so that I would get sufficient coupler swing inside the box, although the mounting screw is offset towards one end of the shank.


And here the coupler is in place in the box (and still everything is upside down in the picture).


As can be seen the coupler is no longer in its pristine brass state. This since it has been "blackened" in vinegar. I searched the net for ways of blackening brass, and found acetic acid, better known as vinegar. Since vinegar is easy enough to obtain I decided to try it. It did the job, but it was not a fast process. I think the coupler sat in the vinegar for 10 days or a fortnight, but eventually it changed color.

Here the complete assembly has been test fitted on one of the cars.


And last, the compulsory comparison to the stock coupler.


Here is a short video showing that the coupler mechanism still works after the vinegar treatment.


Next is coupler box painting and weathering. Stay tuned.


Saturday, March 25, 2017

Coupler boxes

I got in contact with the guy who had designed the Berwick coupler boxes mentioned above and on sale at Shapeways. I asked him if he thought those boxes would fit my PS-4427 hoppers. He said no, but kindly (and totally surprising for me offered to design some that would). I guess he could use some for himself, and not did this out of kindness only. But who knows? Anyway, I am very grateful. We exchanged some proto and model photos, along with some model measurements, and he came up with this beautiful design:


The box is not specifically designed for the Protocraft Clouser coupler, since he wanted a more generic design. But I think I'll be able to come up with some way of mounting such a coupler in the box.

I have bought a six-pack of the coupler boxes and they arrived a few days ago, and in IRL they look like this:


Very good, don't you think?

The boxes are easily attached to the cars, using the original mounting screws and holes. They only need to be countersunk for the screws to not later interfere with the coupler shank. Here is one of the boxes test fitted on one of the cars.


Friday, March 24, 2017

An old battered shed

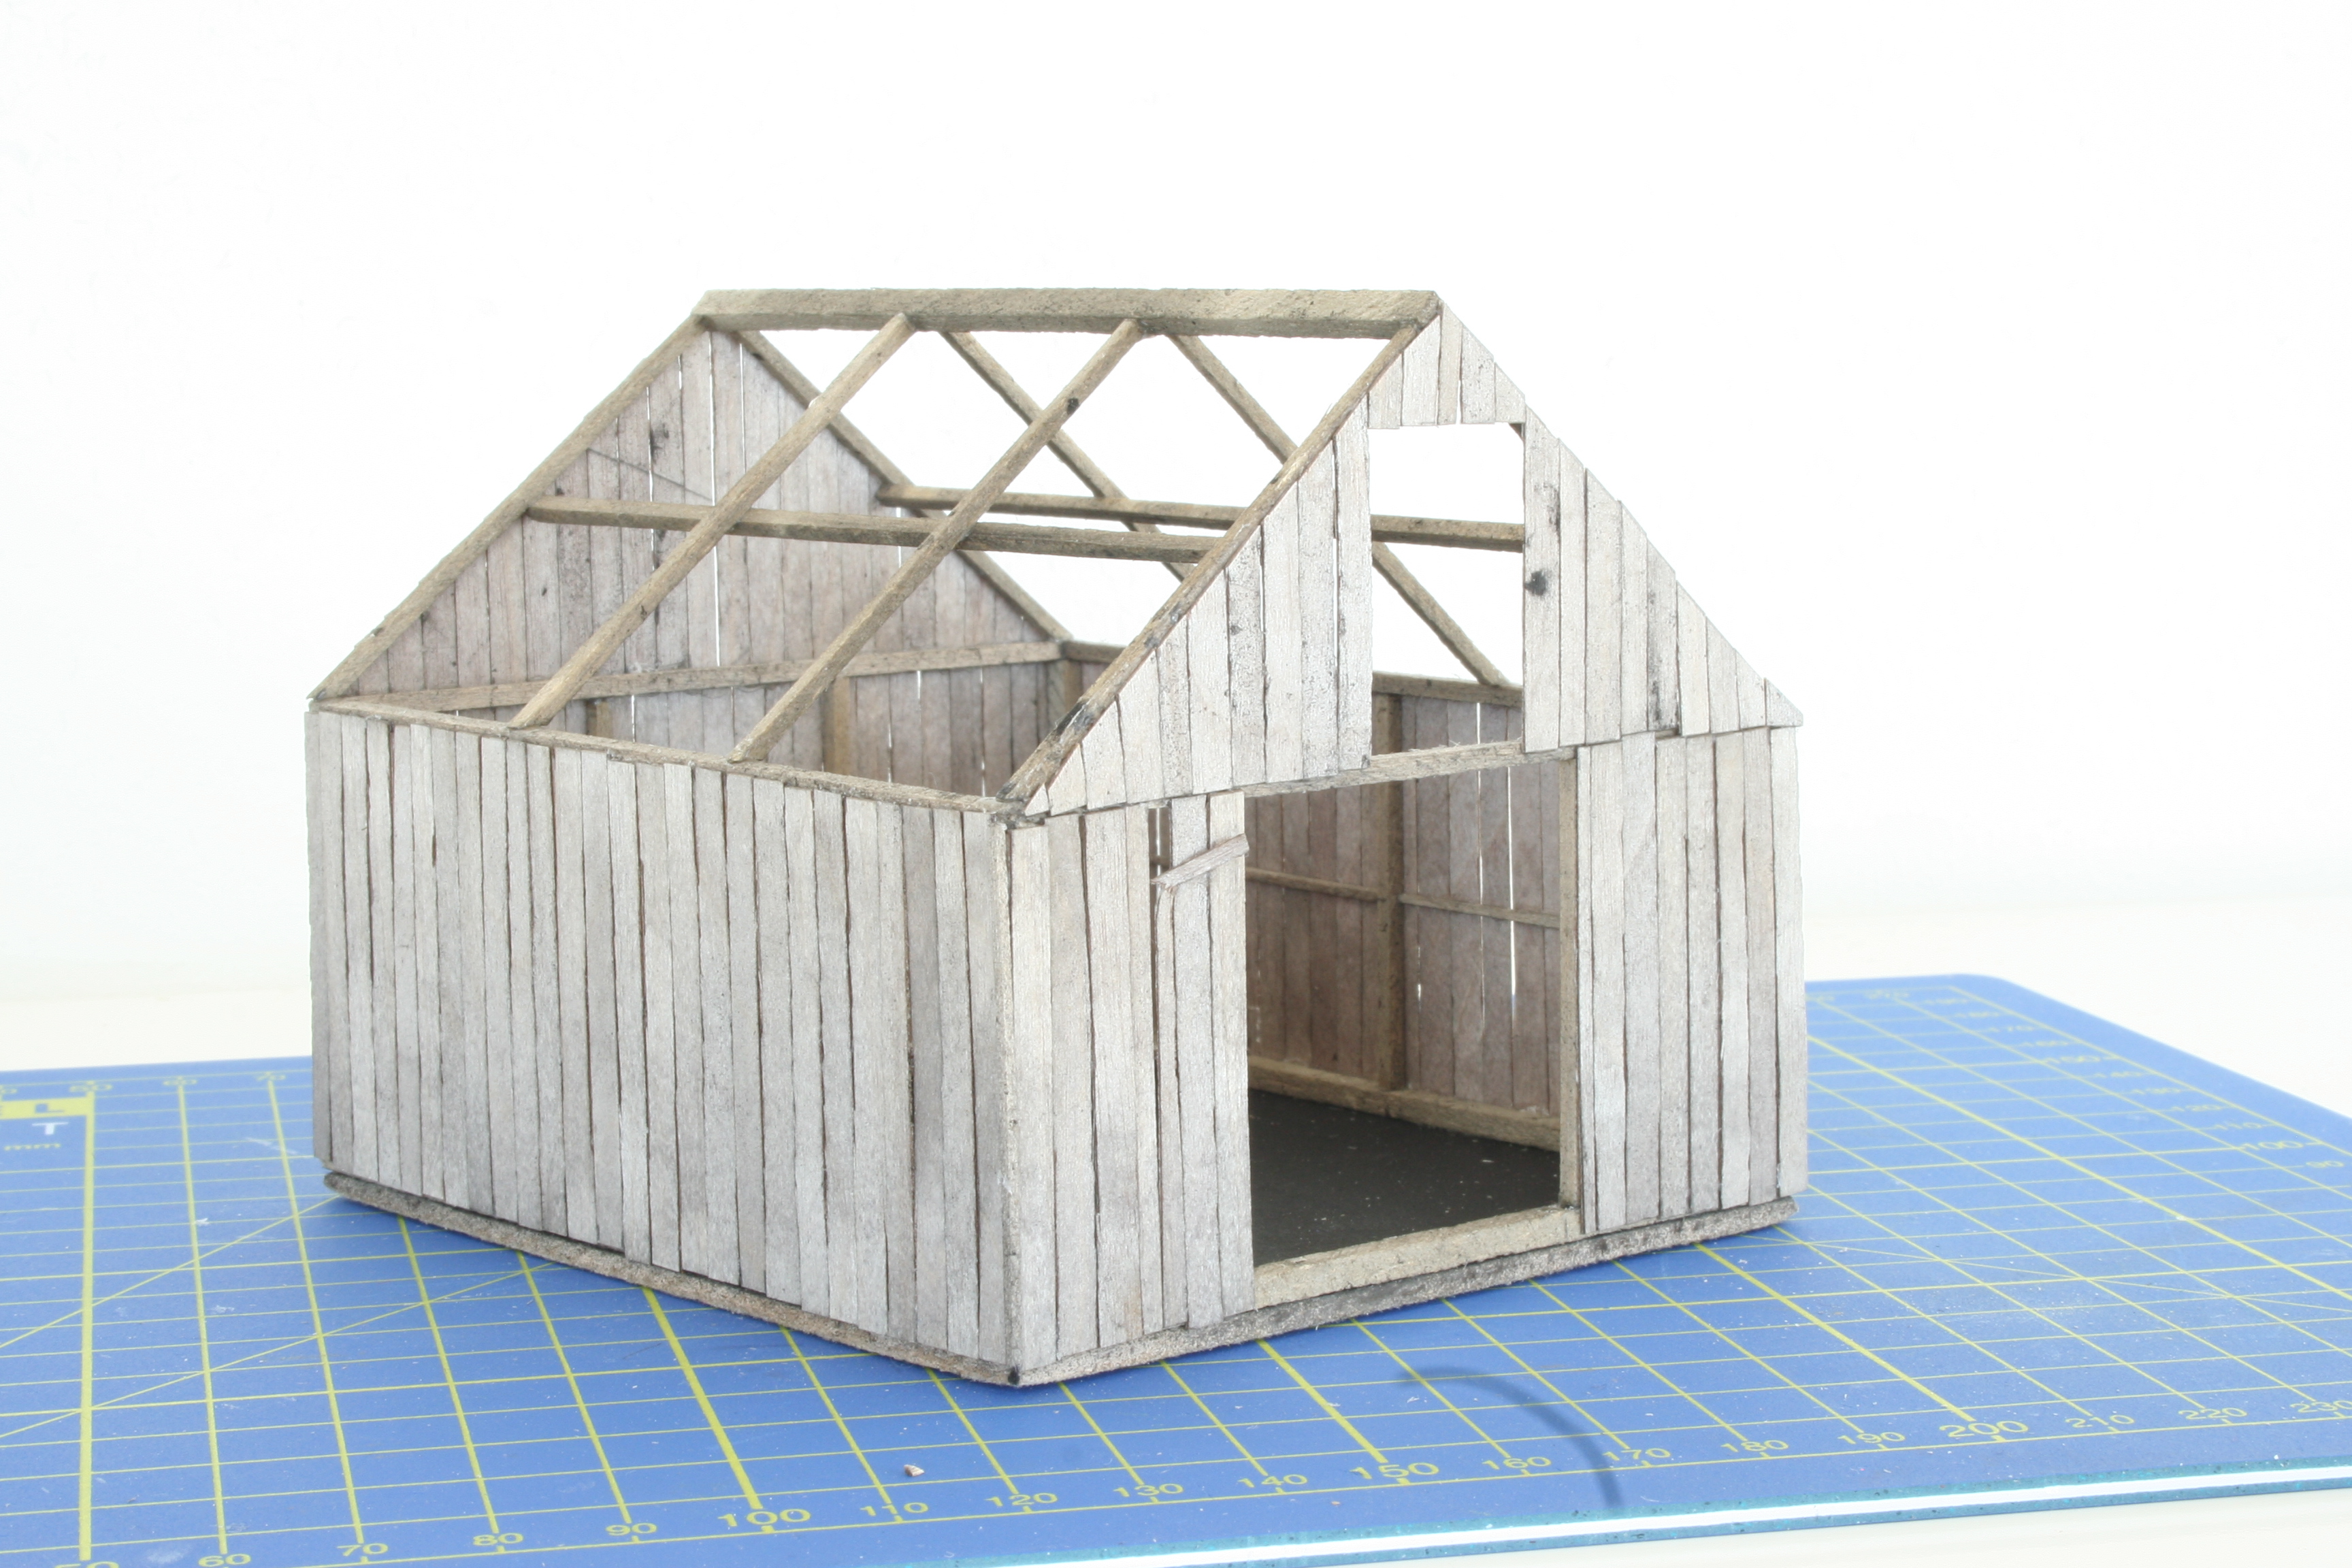
There is not much room on the layout for any structures, but I wanted at least one building of some kind. I settled for a battered old shed or barn, in the far corner. It serves, and has not served, any rail purpose but just happens to sit close to the tracks. Here is what I came up with.


Come along if you want to see how I built it.

I started with a Masonite base painted black and a frame of scale lumber. All lumber, throughout the build, was cut to length and stained in a bath of India ink before assembly. For size comparison, an O scale figure is seated beside.


Next I cut wall boards from .4 mm plywood and glued in place.


I also added some doors, broken and hanging askew.


Next was the roof frame, and the upper part of the gables.


Now for an extra fun part. Fun because I had never done anything like it before: Metal corrugated roof panels, etched in ferric chloride to get a worn and rusty look. The warning in the how-to-pamphlet that came with the roof panels was true - it is easy to etch the panels to oblivion.


As seen I also added door hinges, made from styrene. The green is supposed to be mildew or fungus of some kind, but I not too happy with the result. I later tried to tone it down.

If you look carefully you can also remnants of batten on the side wall. I added a few of those to indicate that the shed originally had a board-and-batten siding.

Last, some more pictures of the shed in its final scene on the layout.